| |
Calibrate
and profile monitor
Module
Objective: At completion of this module you will be able
to calibrate and profile a monitor utilizing given hardware and
software tools.
This is generally
the easiest yet one of the most important parts of an ICC color
managed workflow. If your camera, scanner and printer are all calibrated
and profiled but your monitor has a red, green or blue cast to it
you cannot expect to visually optimize and edit your images. Photographers
are visually oriented, we also like to edit and tweak our images,
this makes a calibrated and profiled monitor vitally important.
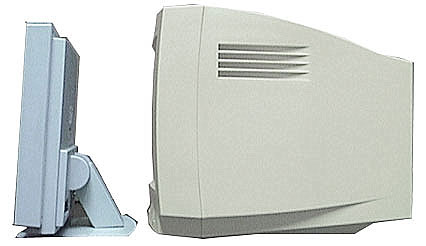
CRT
vs. LCD
monitors:
Although LCD
monitors are still relatively new to the computer industry, the
quality and cost of these units has dramatically improved over the
last few years and LCD monitor sales have increased substantially
because of this. It really has now come down to personal preference
as to what monitor you buy or use. In general either one will work
fine for digital color work, although the CRT models are still thought
to work better for very critical color evaluation.
Characteristics:
|
CRT
- Relatively
inexpensive
- Better
for critical color work
- Heavy
and bulky
- Monitor
flicker can be irritating
|
LCD
- More
expensive than CRT
- Color
changes with viewing angle
- Thin
and light
- No
flicker
- Thought
to last longer than CRT monitors
|
|
All of today's
color tool manufacturers now have devices that will properly calibrate
and profile either CRT or LCD monitors (a fairly recent development).
The following step by step demonstration will make use of a Colorimeter
manufactured by GretagMacbeth,
the "EyeOne Display". While the steps illustrated here
are specific to this device and software the general concepts and
steps are very similar to other manufacturers devices and software.
Please note that monitors do not have to be calibrated and profiled
with hardware devices, monitors can be visually calibrated as well,
for example a built in visual calibration routine can be found in
Apple's OSX Display Control Panel. The use of a Colorimeter however
is much more accurate and consistent than visually calibrating a
monitor as the accuracy
of human color vision can be quite varied. Remember,
ideally we want repeatable and predictable color, a
hardware device gives us the best opportunity to achieve consistent,
predictable and accurate color on a monitor.
Tools:
- Apple
G4 Computer OS 10.2.6
- GretagMacbeth
Eye-One Display Colorimeter
- Eye-One
Match software
- Sony
CRT Monitor
Step
1: Make
sure monitor has been on for at least 30 minutes. This allows the
monitor to reach a stable operating temperature, critical for accurate
color calibration and profiling.
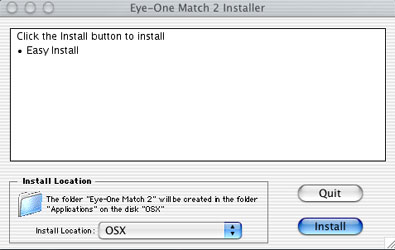
Step
2: Install
monitor calibration/profiling software if you have not done
so already.
|
|
|
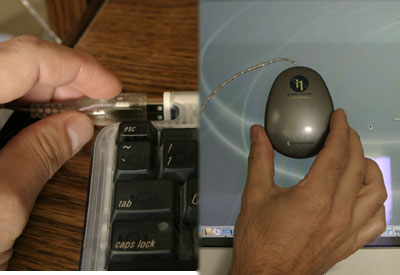
Step
3: Attach
colorimeter to monitor. This colorimeter is powered from the
USB connector on the keyboard.
If possible
mount the unit at the center of the monitors screen. Simply
press the colorimeter into place the tiny suction cups will
hold it. You may need to wet the suction cups slightly to
get the colorimeter to stay in place.
|
|
|
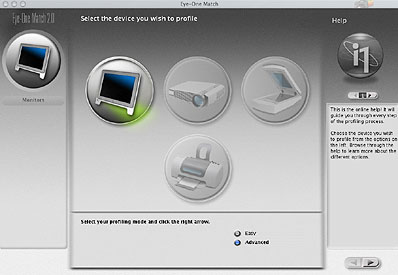
Step
4:
Open calibration/profiling software
This
module is based on the use of Gretag Macbeth's "Eye-One
Match 2" software. Select Monitor as
the device to be calibrated/profiled. Prepare
the room for monitor calibration, turn off or dim room
lights, close curtains or shades if windows are present.
|
|
Step
5:
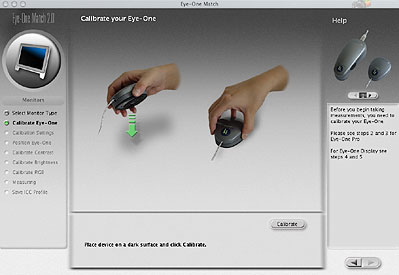
Calibrate colorimeter, simply place the colorimeter on a flat
surface (sensor down) and then select the calibrate device
button in the software.
Doing
this will ensure that the colorimeter is working properly
and set to a calibrated state.
|
 |
|
Step
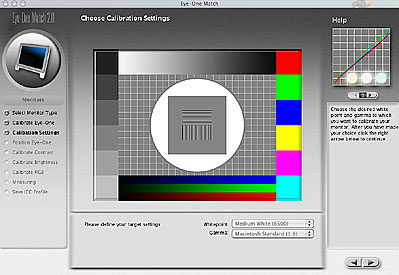
6: Set
the monitors white point and gamma.
Normally
you would set your white point to your viewing condition (color
temperature) in this case we are going to set
it to 6500 Kelvin. Monitors calibrated
to a white point of 5000K or 5500K tend to look too warm (yellow)
and dingy (dark). So set your white point to 6500K even if
your viewing conditions are 5000K or 5500K
Normally
you would set the monitors gamma to 1.8 for
Apple computers and 2.2 for other PC's. For best results however,
we are always going to set the gamma to 2.2, regardless of
platform. Gamma basically refers to the luminance capability
of your monitor.To determine precisely what this value is
for your monitor click
here. |
|
Step
7: Set
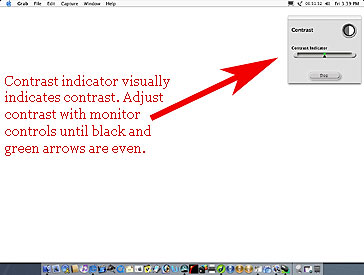
the monitors contrast.
The Eye-One
match software will prompt you and walk you through setting
the optimal contrast on your monitor. This software actually
measures contrast via the colorimeter for a very accurate
measurement. Some monitor calibration/profiling applications
utilize a visual prompt to set contrast, which will not give
you the same accuracy.
|
|
Step
8: Set
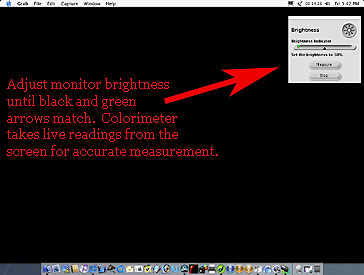
monitor brightness
The Eye-One
software again walks you through this task. The colorimeter
makes readings off the screen as you manually adjust brightness
until the optimal setting is achieved.
Note:
Older monitors may not achieve optimal brightness, especially
CRT monitors over three years old. If optimal brightness or
contrast are not achieved calibration and profile will be
inaccurate. If this is the case it might be wise to purchase
a new monitor.
. |
|
Step
9: Set
RGB monitor values
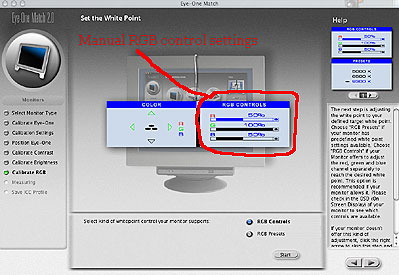
This
image shows the RGB gun controls for a CRT monitor. Many CRT
monitors let you adjust the Red, Green and Blue color levels
on your monitor by adjusting the output of the RGB guns. LCD
monitors generally do not allow this manual control of RGB.
If your monitor does not allow this manual control or any
of the previous manual controls, you can simply skip that
step. In doing so, you will however not achieve an optimal
calibration or monitor profile.
|
|
Step
10: Software
automatically calibrates and profiles monitor
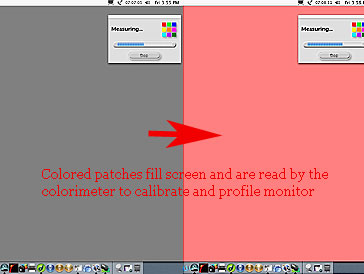
The Eye-One
software will now display, white, black, gray and colored
patches of known value on the screen. The colorimeter will
read these values, compare them and adjust the video card
appropriately. When complete your monitor will be properly
calibrated and profiled.
|
|
Step
11: Name
and save profile
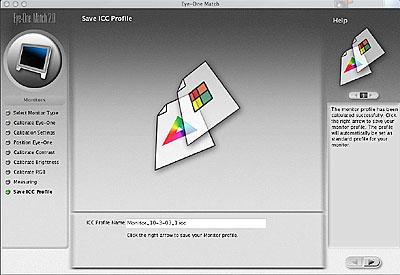
The software
has created a custom monitor profile
that you can now name and save. This software automatically
includes the current date, which is very useful as it's a
reminder of when the last calibration and profile were done.
It's
a good idea to calibrate/profile your monitor weekly if possible.
|
|
Step
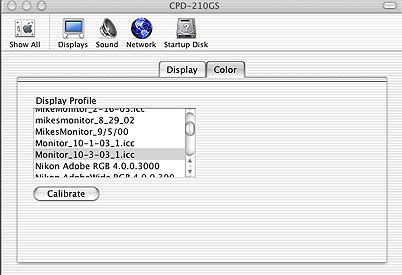
12: The
Eye-One Match 2 software does one last thing behind the scenes
for you, it sets the newly created monitor profile as the
default monitor profile for your operating system.
The screen
grab to the right shows us that the new monitor profile has
been selected and will now be used by the OS (Apple's OSX)
and any applications, IE: photoshop, that can make use of
it.
|
|
Great job!
You've reviewed the steps needed to calibrate your monitor. Before
you move onto the next module please complete the following review
questions. These questions will determine how well you remember
and understand this information. If you have trouble with these
questions you may want to review this information before moving
on to module 2.
Review
Questions: click
on the correct answer
1) When you
calibrate a monitor you are in effect describing its color characteristics.
2) You should
always select a gamma setting of 1.8 for monitors connected to an
Apple computer and 2.2 for any other PC?
3) In general
what is the best color temperature to calibrate your monitor to
for viewing and editing images?
4) The most
prevalent monitor calibrating/profiling device on the market today
is?
5) Monitor
profiles control the color temperature of your monitor and allow
for accurate color display?
OK, hope you
did well on the test. Please proceed to Module 2, "Profiling
a Scanner".
______________________________________________________________________________________________________
|


